Upgrading a vehicle can improve comfort, safety, performance, and daily usability. However, a new part is not automatically a compatible part. A larger battery may fit the tray but overload the charging system. Wider wheels may clear the fenders but alter steering behavior. These details show why how to ensure compatibility when upgrading your vehicle requires more than comparing product photos.
Reliable upgrades begin with evidence. Check the vehicle identification number, model year, engine specification, factory options, and current mileage. Use manufacturer fitment data, technical manuals, and verified measurements. Confirm connector types, software requirements, load ratings, braking capacity, and available clearance. A qualified technician can also identify hidden conflicts, such as restricted suspension travel or insufficient electrical capacity. Small measurements matter.
Do not rely on assumptions.
The best approach combines research, professional inspection, and controlled testing. Installers should inspect related components before fitting an upgrade. After installation, they should check warning lights, alignment, fluid leaks, heat buildup, and unusual noise. A short road test on a safe route can reveal problems that a workshop bench cannot. Keep invoices, specifications, installation notes, and maintenance records for future reference.
Even careful planning has limits. Product listings can contain errors, and vehicle configurations may vary within the same trim level. I have seen “direct-fit” parts require minor adjustments, which is a useful reminder to verify everything independently. The following guide presents ten practical ways to improve upgrade compatibility while protecting reliability, safety, and long-term value.
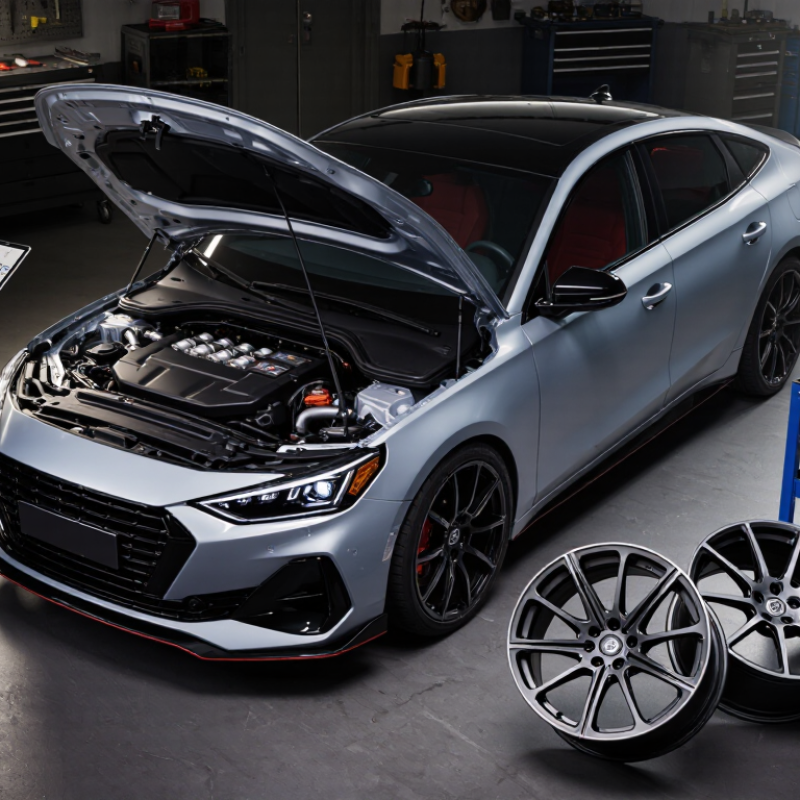
Before choosing any upgrade, record what the vehicle actually has. Note the model year, engine, transmission, drivetrain, axle ratio, wheel size, brake setup, and electrical capacity. The identification number and service records can confirm details that online listings often miss. Measure ground clearance, ride height, and mounting space with a tape measure. Small differences matter.
Then define the intended result in practical terms. Is the goal safer towing, sharper handling, more cargo capacity, lower fuel use, or better cabin comfort? Set measurable targets, such as a 300-kilogram payload increase or 20 millimeters of added clearance. Check the vehicle’s certified limits before selecting parts. A stronger-looking component cannot safely raise those limits. That distinction is easy to forget.
Compatibility depends on the complete system, not one attractive component. Compare dimensions, load ratings, connector types, heat requirements, suspension travel, and sensor dependencies. In workshop planning, I have seen a wheel upgrade fit the hub but contact the brake assembly. It looked correct. It was not. Use service manuals, technical bulletins, and a qualified inspection when measurements disagree. Keep photos, measurements, and test results in one file. This process feels slow, but guessing can cost more.
A successful vehicle upgrade begins with accurate part-fit verification. Record the vehicle’s year, model, engine type, trim, and existing equipment. Measure mounting points, connector shapes, clearance, and load limits before ordering anything. Measure twice. Read the installation instructions, compatibility charts, and technical drawings from reliable sources. Do not rely on appearance alone. Two parts may look identical but use different signals or mounting standards.
System compatibility requires a wider view. Check voltage, current demand, communication protocols, sensor ranges, and software requirements. Confirm that the vehicle’s control modules can recognize the new component. Inspect fuse capacity and wiring condition. A qualified technician should test grounding and circuit protection with proper equipment.
I once overlooked a small connector difference during a workshop inspection. It caused hours of avoidable troubleshooting. That mistake still influences my checklist.
Test nearby systems, too, including lighting, braking assistance, displays, and security functions. Never assume an upgrade works because another vehicle uses it successfully.
Manufacturer requirements can affect installation, calibration, maintenance, and warranty support. Follow specified torque values, approved fluids, programming steps, and clearance requirements. Keep invoices, test results, serial information, and installation records in one file. Ask the supplier for written confirmation when compatibility remains uncertain. A professional inspection is especially valuable after suspension, steering, electrical, or safety-related changes. Do not guess. Some manuals leave unclear details, and that deserves careful review rather than confident improvisation.
Top 10 Ways to Ensure Vehicle Upgrade Compatibility
A vehicle upgrade should begin with the electrical system, not the shopping list. Check voltage, current draw, fuse ratings, connector types, and available circuit capacity. A small test with a multimeter can reveal unstable power or poor grounding. Inspect battery health and charging output under load. Confirm that added lights, sensors, or audio equipment will not overheat existing wiring. I have seen minor wiring changes cause warning lights weeks later. That possibility is easy to underestimate.
Software compatibility deserves equal attention. Verify firmware support, communication protocols, diagnostic access, and update procedures before installation. Some upgrades may interfere with driver-assistance alerts, dashboard displays, or immobilizer functions. Ask a qualified technician to scan the vehicle before and after the work. Keep original settings and installation records. Testing in a quiet area helps, but it is not enough. Software behavior can change after a later service visit, which makes documentation valuable.
Safety checks should cover braking, steering, visibility, tire clearance, crash sensors, and structural mounting points. An accessory that shifts during sudden braking is not a harmless inconvenience. Confirm that the upgrade does not block lights, sensors, mirrors, or emergency equipment. Legal compatibility varies by location, vehicle age, and use. Check inspection rules, lighting limits, noise requirements, emissions standards, and insurance disclosure duties. Online advice may be outdated. A certified installer or local transport authority is more reliable. I would also admit this: compatibility guides cannot predict every unusual vehicle condition, so a cautious inspection remains essential.
Vehicle Upgrade Compatibility: Installation, Performance, and Warranty Risks
Vehicle upgrades should begin with the installation method, not the advertised feature list. A direct-fit component usually matches existing mounting points and factory connectors. It often reduces cutting, rewiring, and dashboard damage. Universal parts may cost less, but they demand accurate measurements and careful fabrication. A loose bracket can create vibration, noise, or premature wear. Keep the original hardware.
Performance changes depend on the entire vehicle system. A heavier wheel may sharpen appearance but reduce ride comfort and acceleration. Additional electrical equipment can overload a circuit if its current draw is ignored. Measure voltage, temperature, clearance, and operating noise after installation. A short test drive is not enough. Inspect the vehicle again after several days. Small faults can appear later. This step is sometimes skipped, even by experienced owners.
Warranty risk requires closer attention than most upgrade guides suggest. Read the vehicle warranty and component instructions before modifying wiring or control systems. Keep installation receipts, photographs, torque settings, and test results. These records can support a legitimate claim if a dispute occurs. However, documentation cannot fix an unsafe installation. A qualified technician should confirm compatibility, especially with braking, lighting, steering, or restraint-related systems. I would also question upgrades that promise dramatic gains without measured evidence. The attractive result may hide extra heat, faster wear, or complicated servicing.
Vehicle upgrades should be treated as controlled changes, not quick installations. Before fitting a new component, record mileage, fault codes, fluid levels, tire pressure, and battery voltage. Photograph connectors and mounting points. These details create a useful baseline for comparison. A qualified technician should check load ratings, clearances, wiring protection, and software dependencies. Small mismatches can produce heat, noise, or warning lights days later. Test one upgrade at a time. This makes cause and effect easier to identify.
After installation, begin with a stationary inspection. Check fastener torque, leaks, cable movement, and dashboard messages. Then use a short road test on familiar roads. Monitor temperature, vibration, braking response, steering feel, and energy use. Record readings at cold start, normal speed, and higher load. Keep the first test conservative. Real conditions expose problems that a garage cannot.
Document the date, installer, component specifications, settings, test route, and results. Store photos and diagnostic scans with the record. Review the vehicle after several drives, not just one successful trip. A missed detail matters. I would also note what was not tested, because confidence can become careless. If symptoms appear, stop using the upgrade and seek qualified inspection. A clear record prevents repeated guesswork.
Record the model year, engine, transmission, drivetrain, axle ratio, wheel size, brakes, and electrical capacity. Measure clearance and mounting space. Small differences matter.
Define a practical goal, such as safer towing, improved handling, or more cargo capacity. Use clear targets, like 300 kilograms of extra payload or 20 millimeters of clearance. Check certified vehicle limits. Stronger parts cannot legally raise them.
One compatible component does not guarantee a compatible system. Compare dimensions, load ratings, connectors, heat needs, suspension travel, and sensor requirements. A wheel may fit the hub but touch the brakes.
Check voltage, current draw, fuse ratings, connector types, and spare circuit capacity. Use a multimeter. Inspect battery health and charging output under load. Added equipment must not overheat existing wiring.
Confirm firmware support, communication protocols, diagnostic access, and update procedures. Some upgrades can affect alerts, displays, or immobilizer functions. Scan the vehicle before and after installation. Keep original settings and records.
Inspect braking, steering, visibility, tire clearance, crash sensors, and structural mounting points. Check that nothing blocks lights, mirrors, sensors, or emergency equipment. An accessory that shifts during braking is dangerous.
Check local inspection rules, lighting limits, noise requirements, emissions standards, and insurance disclosure duties. Rules vary by location and vehicle use. Online advice may be outdated.
Store identification details, service records, photos, measurements, scan results, and test findings in one file. Use a qualified inspection when measurements conflict. I might still miss an unusual defect. Careful inspection remains necessary.
Upgrading a vehicle safely begins with understanding its current specifications, including the engine, electrical system, suspension, brakes, software, and existing accessories. Clearly define your upgrade objectives, then verify that each selected part fits the vehicle and works with related systems. Check size, power requirements, connection types, operating limits, installation instructions, and manufacturer requirements before purchasing. It is also important to consider electronic communication, software settings, safety features, emissions controls, and applicable road regulations. These checks explain how to ensure compatibility when upgrading your vehicle without creating avoidable problems.
Before full use, compare professional and self-installation methods, evaluate possible effects on handling, efficiency, comfort, and reliability, and understand how modifications may affect warranties. After installation, test the vehicle gradually in a controlled environment, monitor warning indicators, unusual sounds, temperatures, and performance changes, and correct issues immediately. Keep clear records of parts, settings, installation steps, tests, and maintenance so future servicing remains accurate and safe.

Motix Car